What’s changed in Google Ads Locations reporting and why you need a custom report
Simplified locations reporting misses the nuance of user location — here’s what you need to do to get that data, too.
Google has been rolling out “simplified” location reports in the Google Ads UI over the past month or so. Any time a platform uses “simplified” or “streamlined” to describe a change, we have to wonder if it’s a red herring. Does it provide an easier way to get at the same access, data and functionality? Or is it “simplified” — wink-wink — with features and data stripped out?
Before we get into these changes, first a reminder about why location settings and reporting are important.
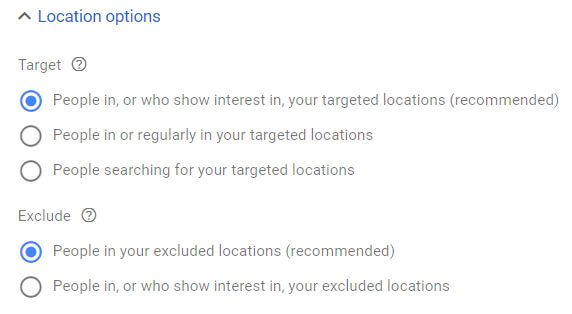
Google’s default Location options (hidden below a dropdown under campaign Settings) is set to target “People in, or who show interest in, your targeted locations.” This is the most expansive option and often leads to spending in locations that don’t convert, particularly when you’re targeting at the country level. For example, if you’re targeting the entire U.S., your ads can potentially be eligible to show to someone in another country who has expressed some interest at some point in the U.S. — even if they don’t use a location qualifier in the search that triggers your ad. If you’re using this setting, then location reporting is very important.

Last year, Google expanded the “People in your targeted locations” targeting option to “People in or regularly in your targeted locations” to capture people who commute to or visit the locations you’re targeting. Users don’t need to be physically located in the area to see your ads. That can be a good or bad thing, but again, it’s more reason to audit performance by user location; which now brings us to what’s new.
What’s changed in Locations reporting
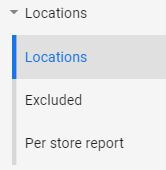
Google has consolidated Locations reporting into one report. The old Geographic and User location reports are rolled up into it — sort of.

A dropdown on the Locations report shown below allows you to filter performance data by the locations you’re targeting or the matched locations (for a campaign or the full account). Per Google’s updated help page:
- Targeted locations show performance of the locations you’re targeting.
- Matched locations show the locations matched based on either the user’s physical location or location of interest.

For example, if someone in New York searches for “restaurants in Paris,” Paris would show as the matched location, if that’s what’s being targeted in the campaign. But how does the advertiser see the user location of “New York” now? That’s no longer available in this reporting. You’ll have to create a custom report in Report Editor. (More on that below.)
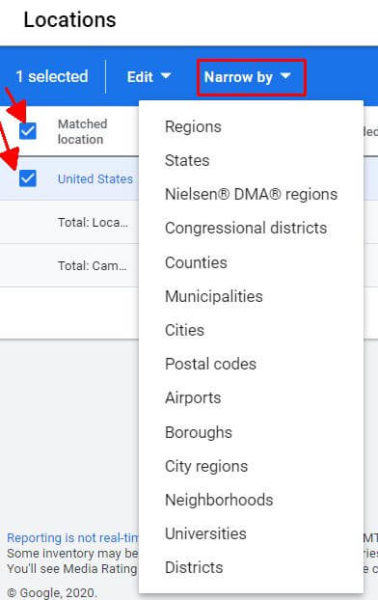
Matched locations detail. It can be a bit easy to miss, but if you click on the box at the top of the locations list or on an individual location, you’ll have the option to narrow the matched location view and drill into detailed locations such as Nielsen DMA regions, postal codes, neighborhoods, and more.
Again, this is matched data, which means it can show both the location of users in your targeted locations and their location of interest. It still won’t let you see the user location of those who showed interest in the location you’re targeting. (That’s in the next section.)

Location Type. Location Type is no longer a Segment option in the main Google Ads UI. This allows you to see performance data broken out by “location of interest” and “physical location”. However, Location Type is still an option in Report Editor. Using this in a report shows you the aggregated performance data for each option. But note that you can’t get a report that shows user location filtered by “location of interest.”
Distance reports. If you’re using location extensions, you’ll find the distance report available as a pre-defined “Distance” report in Reports. This shows the distance between the location that triggered the ad and the closest business location.
How to get user location reporting in Google Ads
If you’ve kept reading to find out how to see user location data — and not just matched location data — you’ve arrived. We can still get user location data in Google Ads, but we have to work for it by setting up a custom report in Report Editor.
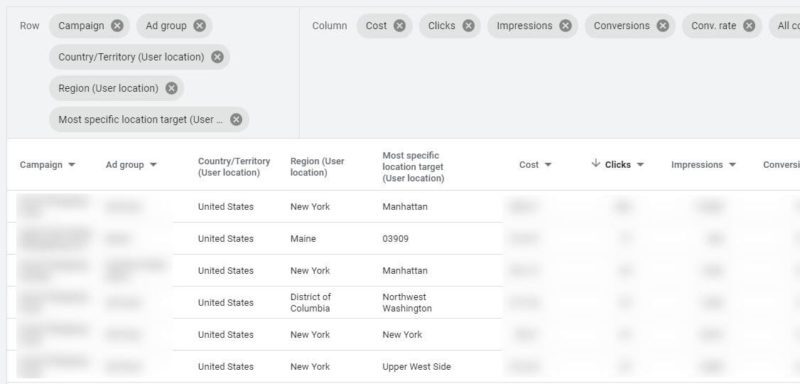
There are five levels of “user location” data in Report Editor: Country/Territory, Region (state, province, etc.), Metro area, City, Most specific location target (zip code, city area, etc.).
When you add “user location” options to your report, it might look something like the example below. Add filters to weed out zero-click or impression locations to see where you’re spending money. Depending on your location option settings, you may see a wide range of user locations.

Filter by performance for campaigns with one or more conversions to see user locations that are converting and/or filter ad groups with zero conversions to see what user locations aren’t converting. Or filter by cost to see where you’re spending but not converting, etc. You might also find the scatter chart view can helpful in identifying location problems.
(Note: I have better luck making filters work by clicking on the column I want to filter rather than using the Filter function at the top of the report.)
No location filters. The big limitation here is you can’t filter these reports by location. That means there is no report of just the locations where users were outside of your target areas and your ads were either triggered by interest or “regularly in.” You’ll have to do that analysis yourself, which means you may need to export it to a spreadsheet where you can do the filtering, pivot tabling, etc.
The takeaway
The ability to drill into matched locations with the “Narrow by” functionality and add bid adjustments and exclusions from the Edit option in the Locations report is certainly handy. But “matched locations” skirts the nuance and value of knowing the (anonymized and aggregated) user location.
If you’re scratching your head wondering how having to create a report from scratch is a “simplification,” you’re not alone. I recommend every advertiser create a User Location report in Report Editor and regularly audit it to ensure you aren’t wasting money in unexpected places. Add undesired locations to the Excluded list, and be sure to take another look at your Locations options settings.
